
Soulframe beginner guide: first hours and fast levelling
Updated: 2026-11-19
Soulframe does not hold your hand: after a short tutorial you are let loose on the island of Alca and decide for yourself where to go. That is why new players often lose their first hours: they wander without a goal, miss key systems and level a single weapon that soon hits its cap. This guide collects what is worth knowing from the first evening: how combat works, what to do in the Nightfold, which tasks to finish first and how to raise Envoy Rank without needless grinding.
Summary
- The Nightfold is your base: you change your pact, weapons, runes, totems and virtue distribution there.
- In combat keep three things in mind: a golden flash on a foe means dodge; a full stagger bar means punish; a glowing soul means Pull Smite.
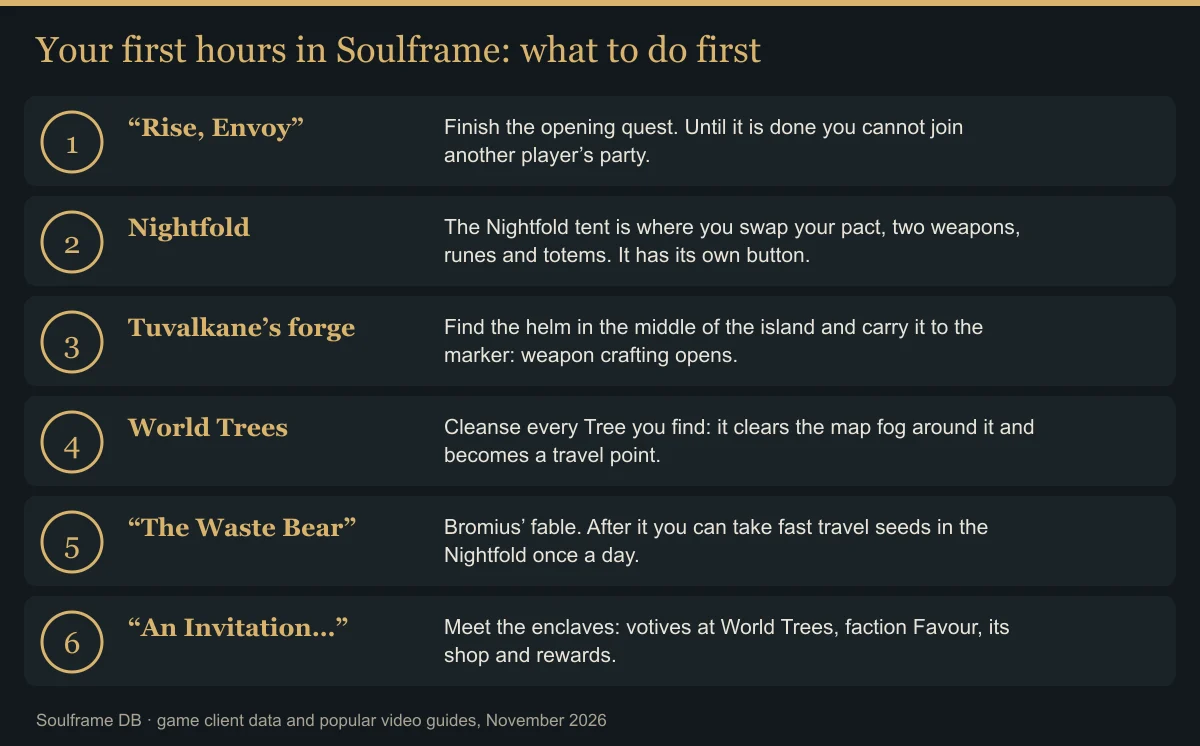
- First goals: Tuvalkane’s forge, cleansing World Trees, “The Waste Bear” fable (fast travel seeds) and joining an enclave.
- Envoy Rank grows from levelling different weapons and pacts and from reclaimed histories. Each rank is a virtue point.
- Do not stick to one weapon: a weapon at its cap no longer raises your rank.
- Smash crates, search weapon racks and pouches by bodies: forge materials pile up from the first minutes.
- Turn on “Compass Always Visible” in settings and call the guiding Sparrow whenever you are lost.
Start: looks, ancestor and pact
During character creation you also shape the hero’s mother; per the videos, her traits pass on to your Envoy. Then the game asks you to choose an ancestor and take up their pact. A pact is a set of three abilities, and it matters more than it looks: per the videos, a new weapon is easier to find than a new pact. If you like the pact from one starter set and the weapon from another, pick by pact; weapons will follow.
The opening quest “Rise, Envoy” gives trial waves of enemies. Use them to try all three pact abilities, not just the first. Per the videos, the starter directions look like this:
- Courage: a taunt and defensive moves, if you want to stand in melee.
- Grace: a decoy that distracts foes when there are many of them.
- Spirit: petrifying foes and a heal placed on the ground that saves healing charges.
Until “Rise, Envoy” is done you cannot join another party; the client says so directly. If you want to play with a friend from day one, finish that quest first.
The Nightfold: what to do there
The Nightfold is the Envoy’s camp outside the main world. Going there and back to Alca uses one dedicated button; the Nightfold is sealed during battle and transitions, and allies cannot enter it for now. The key spot is the tent with the Arsenal.
- Swap your pact, main and second weapon, totems and talismans.
- Runes: the Enchantments window on a weapon. Details in the runes guide.
- Virtue distribution and Envoy Rank are here too.
- Characters you meet in the world (the witch Verminia, the smith Tuvalkane, Orlick and others) move into the Nightfold: after each such meeting, go there for new quests, crafting and trading.
- Bromius’ jug with fast travel seeds appears after “The Waste Bear” fable.
Combat basics
Combat in Soulframe is slower and weightier than in hack-and-slash games: hits land hard and enemies block well. In-game keys come from your own layout, so they are named by action below.
- The basic attack depends on the weapon: a strike, an arrow or a magick bolt.
- Holding the block button raises a block with most weapons. Blocking right as a hit lands is a parry with melee weapons.
- A heavy attack is holding the throw button. It breaks through a raised shield or block.
- Block and throw together hurl your weapon; throwing again recalls it.
- A short dodge press is a hop (backwards without a direction), a double press is a roll out of a blast or big strike (Shift on PC per the videos).
- A golden flash on an enemy weapon warns of a heavy strike: dodge, parry or step out of range.
- The stagger bar: once it fills, the enemy drops to a knee. That is your window for full damage.
Smite and Spectral Sight
Smite makes enemy souls glow. Hold Spectral Sight and attack such a target: that is Pull Smite. It finishes a weak foe, deals damage and stagger to a strong one and charges your rune. Spectral Sight also highlights things to collect, lets you absorb Arcanic Flow and helps find animals to charm. Different videos bind it to different keys (E and Q), so check your layout.
The grey health bar
If an enemy’s health bar is grey and there is a grey cross by its level, that is a warning: its defence is too high for your current damage. Per the videos the rating is not final, so try a buff or heavy attacks. If your damage is still close to nothing, come back later with a stronger weapon.
Healing and death
- The Life Elixir is used from the gear hotkey. Some elixirs cannot be drunk in combat, and the game will tell you.
- Healing charges refill at resting spots; per the videos, red pickups on the ground also restore them.
- Revive Shrines activate when you approach them. When you die, you come back at the most recent shrine you switched on, so walk past shrines rather than around them.
 Life Elixirhealing in combat
 Wevetwood Sapfor The Waste Bear and the Cogah
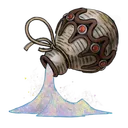 Sacred Shimmervaluable faction resource
 Bromiuspact and the seed fable
How not to get lost
The island map starts covered in fog, and quests do not always lead you to the door. Three things help.
- The guiding Sparrow. A dedicated button (G on keyboard or right on the D-pad per the videos) sends the bird to your current goal. If the bird hovers in place, you are already in the right area: check camps, ladders, chests and entrances.
- The “Compass Always Visible” option in settings. Without it the compass sometimes disappears after transitions.
- World Trees. A cleansed Tree clears the fog around it, and quests in nearby areas show up on the map.
- Our interactive map with shrines, wells, vendors and Trees.
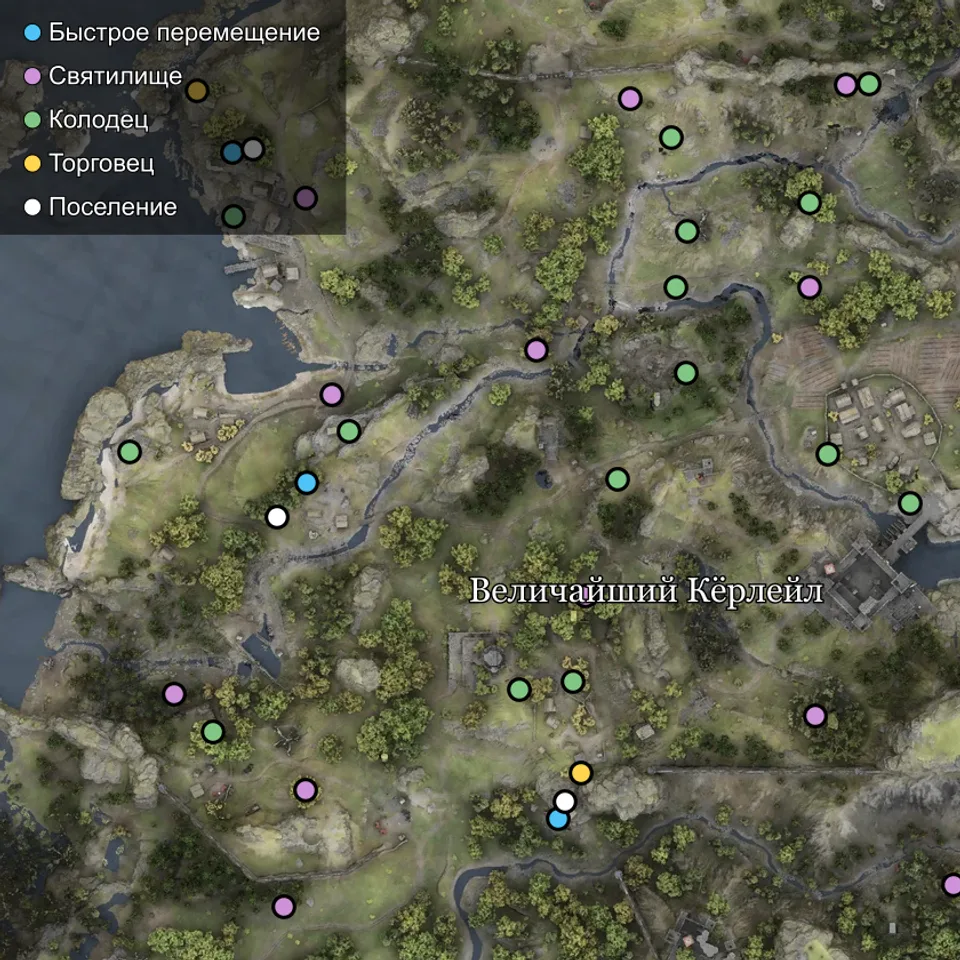
First goals on the island
- The forge. Find the helm in the middle of the island and carry it to the marker that appears: the smith Tuvalkane and weapon crafting open up. Per the videos the whole step takes about five minutes, but the helm is guarded, so deal with the guards first.
- World Trees. Walk to the side of a Tree with an object driven into it and pull it out: the Tree is cleansed and reveals the map around it. The other side of the Tree has a board with enclave votives.
- The fable “The Waste Bear”. It is tied to the Bromius pact and unlocks the seeds for fast travel.
- The quest “An Invitation…”. It introduces the enclaves: The Kith of Kings, The Silent Rose and Alca’s Children. Enclaves give votive tasks, Favour (reputation), a shop and faction rewards: pacts, weapons, armour and materials.
- Fishing and the wolfpup are calm activities that give Harmony and a pet with useful auras.
Resources: what to collect from minute one
The forge needs materials, in-game currency (Dracs) and waiting time. It is better to stockpile resources early than to hunt for them later. Per the videos, these habits work well:
- Smash crates and barrels in camps and dungeons for materials and Dracs.
- Search weapon racks for scrap metal.
- After a fight, check the small pouches near fallen enemies.
- Knock down floating loot orbs and break pots in the Crypt.
- Do not avoid patrols: they give resources, XP and sometimes fragments of items you have not crafted yet.
- Dungeons change layout and loot on each visit, so they are worth repeating. Per the videos, Dermak Undercity is handy for mixed gathering.
- Check the vendor Avakot’s rare materials: buying scrap for Dracs can be faster than searching for it.
Resources and recipes are covered in a separate guide.
Weapon drops: what to look for
Since the Preludes 15 update, weapons drop across Alca fully built, with their own Craftwork and Tempers; the in-game letter about the update says so. So inspect the weapons you find instead of selling them unseen.
- Per the videos, a silvery vine in the top-left corner of the icon marks Moonsteel.
- Sovereign and Legendary Craftwork are the top tiers; per the videos, a Legendary weapon comes with Tempers already. Pick these up even if you have a similar weapon.
- Look at the Tempers: examples in the videos include Voltaic damage, movement speed and overall damage.
- Compare the weapon’s virtue requirements with your distribution: a weapon whose requirements you do not meet hits noticeably weaker.
How to level up fast
Soulframe has no single character level that grows from everything. Progress is split across several meters, and mixing them up is the main reason for slow levelling.
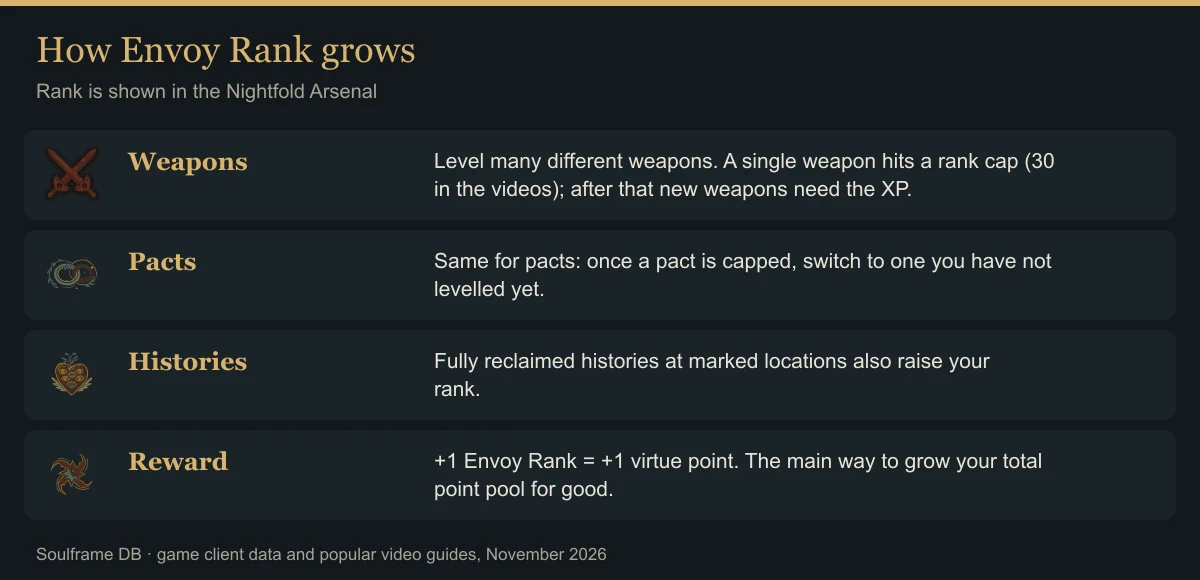
- Envoy Rank is your overall level. It is shown in the Nightfold Arsenal, and every rank gives one virtue point.
- Weapon rank belongs to each individual weapon. Per the videos it stops at 30.
- Weapon class progress gives points to spend on moves and upgrades for that weapon type (for example, throw accuracy).
- Pact rank also goes to 30 per the videos; pact tree points unlock abilities and virtue nodes.
Rule one: level different things
The in-game guidebook says plainly that Envoy Rank grows from levelling weapons and pacts. A weapon at its cap adds nothing more to your rank. So fast levelling is a conveyor belt: once a weapon or pact hits 30, take the next one you have not levelled yet. Craft new weapons and pacts ahead of time if you have the fragments and materials, so the belt never stops.
Per the videos, the weapon in your second slot gains XP even if you barely use it. Keep a fresh, unlevelled weapon there and it will grow alongside your main one. If you run out of weapon slots, sell fully levelled weapons you do not need, but keep the ones you actually play.
Histories: free rank
The second rank source is histories. A fully reclaimed history at a marked location raises Envoy Rank. Per the videos they are easy to find: golden wisps hang near landmarks, and when a place name appears, a count of motes shows how many histories are nearby. Collect them with Spectral Sight and an attack while facing the wisp.
Where to farm XP
| Method | What it gives | Catch |
|---|---|---|
| Many weapons to the cap | XP for Envoy Rank, weapon class points | one weapon stops at rank 30 (per videos) |
| Pacts one after another | XP for Envoy Rank, pact tree points | keep the next pact ready |
| Histories at marked places | Envoy Rank (guidebook) | look for golden wisps near landmarks |
| Arena in the Glades of Andurin | lots of foes in a row | the room does not appear every run; 20 waves in later versions |
| Night route through camps | dense enemy groups | about a 15-minute window per one video, needs a practised route |
| A party of 2–3 | faster clears | matchmaking will not start under the Cogah |
The arena. Per the videos, the Glades of Andurin sometimes contain an arena room: a long cave passage leads to a big open area with a deer statue in the middle. Walk up to the statue and start the event. Dungeon rooms are reshuffled on each visit, so the arena does not always appear; in one video it took about eight tries. In early versions the event was endless, in later ones it has 20 waves. Before spending an evening hunting for it, compare it with normal farming.
The night route. Another video suggests a small island in the far north-west corner of the map: get ready at the top of the lighthouse, go down when night falls and move from one enemy group to the next. The night window there is estimated at about 15 minutes. Claims like “a weapon to max in one night” are the author’s own estimate without starting ranks, not a guarantee.
The levelling videos were recorded on Preludes 12 and earlier. Arenas, night enemies and rank caps may have changed since, so check in game.
Common beginner mistakes
- Levelling one weapon and one pact. After the cap they no longer move Envoy Rank.
- Not visiting the Nightfold after meeting a new character, which means missing quests, trading and crafting.
- Running past World Trees without cleansing them. The map stays foggy and travel points stay locked.
- Ignoring crates, racks and pouches, then running short of forge materials.
- Fighting enemies with a grey health bar and dealing single-digit damage.
- Spending the starting premium currency on the first thing you see. Per the videos, it is wiser to save it for craft speed-ups or extra slots.
- Selling dropped weapons without checking their quality and Tempers.
- Drinking the Cogah elixir and then trying to find a group: matchmaking will not start under it.
First hours checklist
- “Rise, Envoy” done, all three pact abilities tried.
- “Compass Always Visible” turned on.
- Smith Tuvalkane unlocked (helm delivered).
- Nearby World Trees cleansed.
- “The Waste Bear” fable started.
- “An Invitation…” done, enclave chosen.
- An unlevelled weapon in the second slot.
- Next weapon or pact crafted before the current ones cap.
- Collecting histories at landmarks.
- Gathering resources in every camp.
Next
- Runes: charges, sources and upgrades
- Virtues: Courage, Grace and Spirit
- Pacts and their abilities
- Fast travel and World Trees
- Wolfpup: how to get and train it
- Fishing
- Orlick quests, act 1
- Builds
Bottom line: spend your first hours in Soulframe unlocking systems rather than grinding: the forge, the Trees, an enclave and fast travel seeds. After that, levelling takes care of itself as long as you keep a conveyor of new weapons and pacts and do not walk past histories.
Sources
- Game client data: guidebook, tutorial hints, quests, settings
- Popular YouTube beginner and levelling videos (reviewed 19 Nov 2026)
- Official Soulframe site